Windows Internet Naming Service (BNL-WINS) For Windows 95
Introduction:
The WINS (Windows Internet Name Service) is a network service that automatically resolves a computer NETBIOS name to an IP address. This functionally is similar in concept to the DNS (Domain Name Service) except WINS resolves NETBIOS names while DNS resolves host names.
General:
It is assumed that you have the TCP/IP protocol installed on your Windows95 system. If not, The Windows 95 Resource Guide will assist you on the installation of TCP/IP. As you configure your system, you may be prompted for the Windows 95 distribution media. Have the CDROM or floppy diskettes available. Also, you will need to install the file and print sharing package on both your system at work and your system at home to share resources.
Windows 95 Configuration:
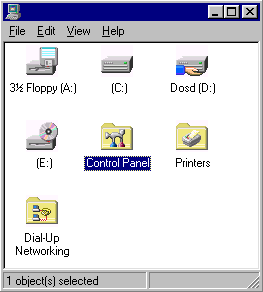 From the main
window double click on the My Computer icon. The icon will now open. Double
click on the control panel icon.
 From the control panel
window, double click the network icon.
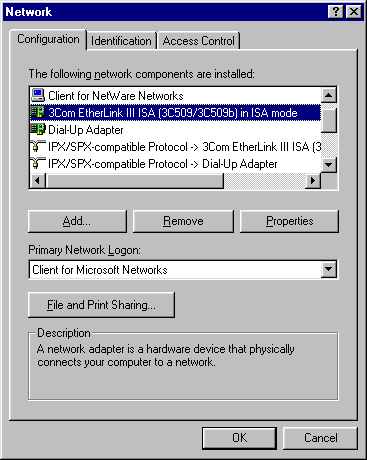 Click
on the identification tab on the folder.
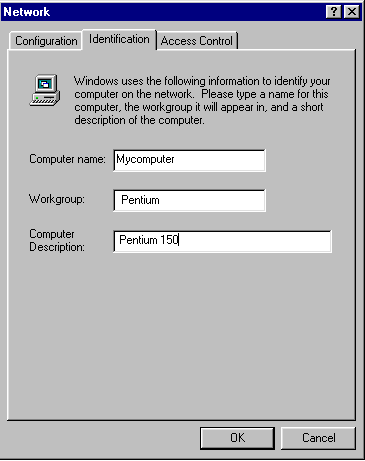 This form
will allow you to enter the NETBIOS name for your computer. You are limited to no more
than 15 characters in a NETBIOS name. As a recommendation, it is best to assign
the NETBIOS name exactly like the DNS name with the subdomain appended. For
example, mycomputer.www.tiplord.com should have the NETBIOS name of mycomputer.das.
Naming your computer in this manner will enable DNS to locate your system. Also,
you can enter your workgroup name. If you use the workgroup name of Pentium, your
systems should be browseable through the network neighborhood icon. Also, you can enter a
description of your computer. When satisfied with the information, Click the Configuration
tab.
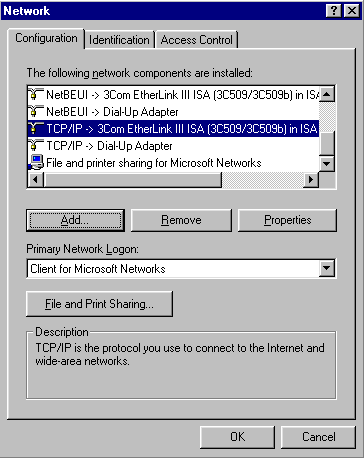
 You are now
back to the network folder. Select your network card from the display. Click
on the properties push button to display the properties form.
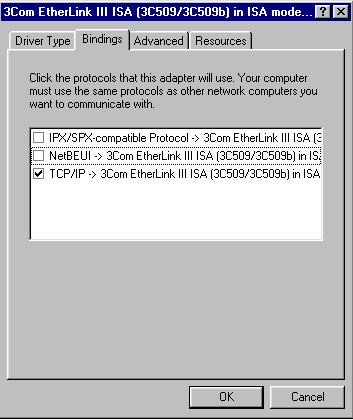 Select
the bindings tab. Ensure that TCP/IP is checked. The other protocols are not
needed or supported by the WINS service. Click the OK push button.
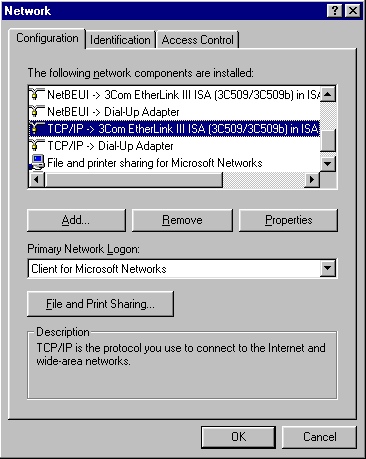 Using the
vertical scroll bar, select the TCP/IP protocol for your network interface. Click
the properties push button.
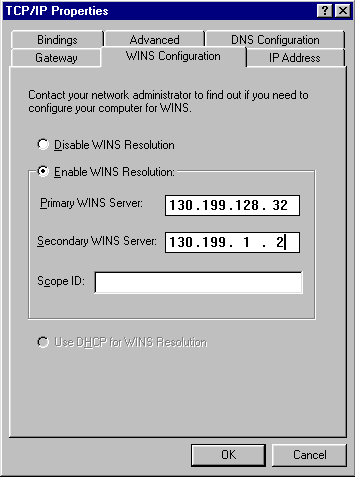 Click
the WINS Configuration tab. Fill in the information as shown. We have both primary
and secondary WINS servers available. Make sure the "enable WINS resolution"
toggle button is enabled. Select the IP Address tab.
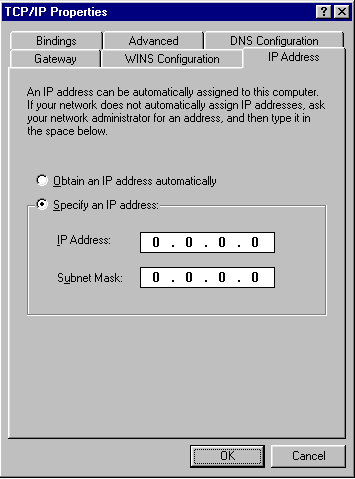 Enter
your IP Address and Subnet Mask values. Ensure the "Specify an IP address"
toggle is selected. Select the DNS Configuration tab.
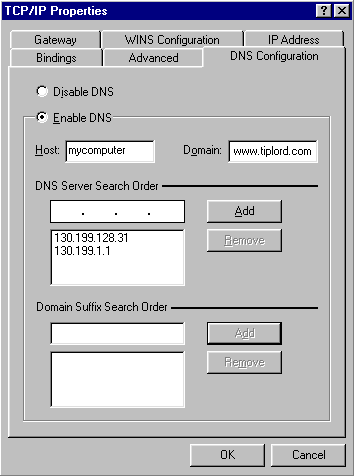 Check the
information as shown. Please check that the Host, Domain, and Domain
Suffixes are correct for the networks you are using. The DNS Servers are the official
primary and secondary name servers for the BNL network. You should always have
bnl.gov in your Search Order list. Set the "Enable DNS" toggle. Click
the OK push button to save the information.
 Click
the OK push button to save your settings. Your computer may prompt for you to
restart.
Your computer is now configured to take advantage of the WINS service.
Shared Resources :
The following steps shows how to configure your computer for shared access to the files on your disk drive. You can also configure your machine to share printers.
 From the main Windows 95
screen Double Click the Mycomputer icon. Now Select the disk unit you
wish to setup as a shared resource. Right Click to display the properties menu. If
you want to configure printers instead of a disk, Double Click the Printers
folder. Now Select the printer to configure and Right Click to
display the properties menu.
 Select the Sharing
tab on the properties menu. Select the Share as and Depends on Password
radio buttons. Enter a Password for the shared resource. The password will
not echo back. Click the OK push button to save the information.
Network Browsing :
Using the Network Neighborhood icon, you can easily locate other systems and resources on the network. The Network Neighborhood will display other systems in your workgroup and/or domain. To access any of these systems, just double click on the icon for the machine. After a few seconds, the shared resources (if any) from the selected machine will be displayed. To access these resources, just double click on the icon. You will be prompted for the password to access the file system or device. As a general rule, the browser is limited in scope to subnets and/or Windows NT domains.
If the system you want access to is not shown in the network neighborhood, you still might be able to access it by use of the Uniform Naming Convention (UNC). The Following example shows how to do this.
 From the main Windows 95 screen, Click
the Start button. Slide the Cursor to the run icon and release the
mouse button. Enter the NETBIOS name of the machine you want access to preceded
by 2 backslashes. If the machine is accessible, the resource list will be presented
as shown in the next frame.
 Once the resource list is
displayed, just select the resource you wish to access.
Network Neighborhood:
The network neighborhood is the simplest way to access other systems in your domain. Just select the Network Neighborhood icon, and all available systems are displayed.
 Double Click on the Network
Neighborhood icon on the main Windows 95 screen. After a few seconds, The current Browse
List will be displayed for your workgroup or domain. Now Double Click on the system
you want access to.
 Double Click on the resource
you want access to. You will be prompted for a Password.